90S MAKEUP Trends Still Rock In 2019

90s makeup

Trust me, nothing’s ever going to old or out of style. For example, today we do like to wear  80s and 90s fashion including dress styles, hairstyles, makeup styles and more. The 90s clothing has fully returned recently, and 90s makeup trends are waving at us for the new year look. From burgundy lipstick to blue eyeshadows, frosty lips, Face-framing tendrils to unforgettable glitter are all back the runway to the street. The 2019 makeup would start the new era in the fashion world, but it will not forget to add 90s fashion on its very special pages. This is why we should always know that fashion will never go out of style as long as you are updating about the new trends in the fashion world. So today I am giving you the best instructions about 90s makeup trends which is still useful in 2019. Embrace the 90s fashion to rock in your makeup once again.

Here are the best 90s makeup trends 

I don’t know about you but clearly, the 90s is the best era of fashion. It just not gave us great movies, TV series but with them, it gave us a great sense of fashion. Unconsciously we still wear 90s makeup today. Did you ever know that matte face, dark lip-liner, brown lipstick are from the 90s? Well, that’s what I am talking about.

Here I am not talking about all the 90s fashion trends but if you do like to know about 90s outfit ideas read here.  But I have found the best of the best make up trend you will totally love to bring back in the year 2019 and here are the trends you should try.

The 90s makeup mainly gave more attention to the 3 areas, such as Eyebrows, eyes, and Lips. When eyebrows were super thin, darker and well-plucked eyes got the smokey look with blue eyeshadows and more darker colors. With the darker lip liners, light lipsticks were the best match in the decade.

Brown lipstick

Recently I sew that Brown lipstick has come to the fashion world, especially Kylie Jenner is using it almost every day. But the origin of brown lipstick is from 90s makeup trends. Actually brown lip color does flatter all kind of skin tones and it does look really good on everyone.
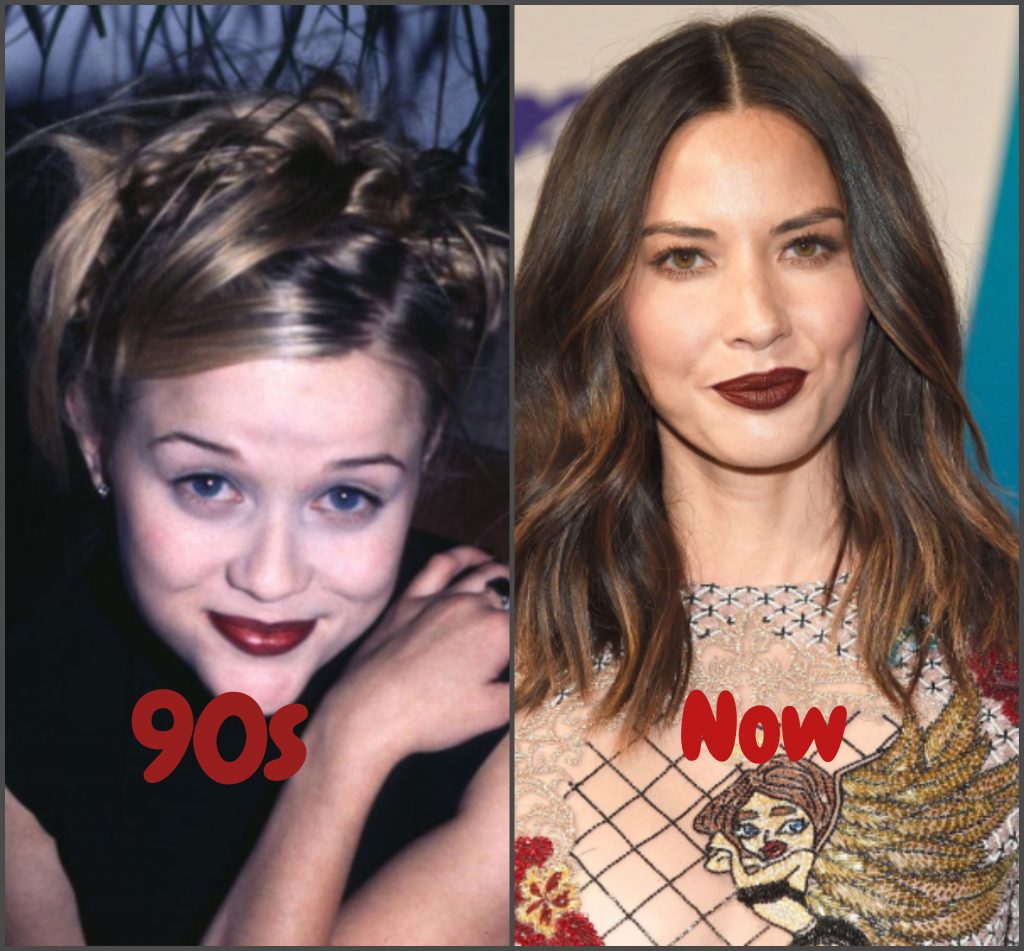
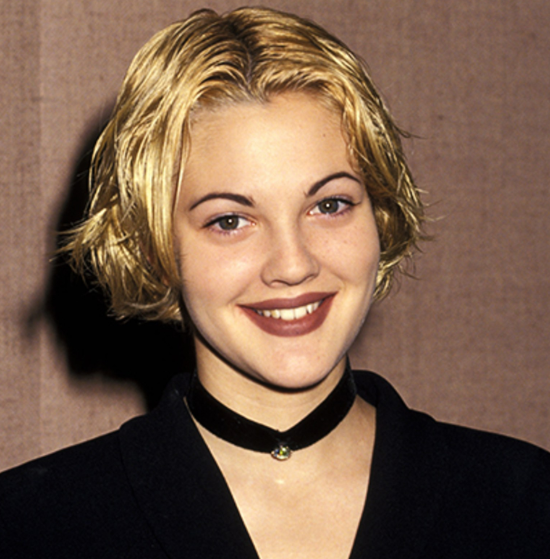
Brown lipstick

Burgundy lipstick

If you are looking at the old 90s celebrity looks it won’t hard to find burgundy lipstick from many of them. Without a doubt, burgundy was the lip color of the decade. And the style has back in today. Since the color is more suitable for cold weather I hope you won’t miss it this winter. For your information, gloss finish burgundy lip color is trending today than 90s matte look burgundy lips.

90s fashion
Image courtesy: Pinterest.com

Blue eyeshadow

If there were the most popular 90s makeup trends that would be blue eyeshadow. I am not sure about this trend but since it is for every kind of women I guess some of you still love to wear blue eyeshadow. Well, it was a real shot back then in 90s makeup trends. You also able to use the blue color as an eyeliner, with your lash line or smokey blue eyes.

90s makeup
Image Courtesy: Pinterest.com

Body glitter

Well, I have a secret, actually, I have been obsessed with body shimmer my entire life. Isn’t that look wonderful? Back in the 90s makeup trends, these shiny glitters were celebrities like Ashlee Simpson, Britney Spears, Brandy best friend and they rocked it. And the style has come back today.

90s eye makeup

Super thin eyebrows

 Super thin eyebrows were huge in the 90s. Every celebrity did in those days including Madonna. Trust me this style is coming back to the new year.

90s fashion
Image Courtesy: buzzfeed.com

  Darker Lip Liner

This is called ombré lip when you use a dark lip liner with light lip color which gives a super 90s look to your face. As you may know, 90s makeup is more into darker shades, lipsticks, eyeshadows than light ones. So same apply to lip liners.

So the makeup styles you were using are not that new trend but they all used in the 90s makeup trends. Isn’t it wonderful to walk in the memory lane and pick up old 90s fashion to rock in 2019? What did you pick up from the makeup trends in the 90s? Let me know in the comment section.


10 best acne treatment- remove acne within a week

best acne treatment
Image Courtesy: Google

Acne is not for teens anymore. Once believe that acne is only affected during teen years but now acne happens to millions of adult women and surprisingly many of them never had acne related problems in the past. Today with the busy lifestyle many people try to treat acne with medications or chemical treatments which often have side effects. Some of them just ignore acne and do their daily routine. So here, I will show you 10 simple and best acne treatment you can simply do at your home. Each of these methods won’t cost your time and money.

I know how you feel right now. Your face is damaged by acne and scars and you are stressed because of that problem. Acne can happen because of so many reasons

  • the buildup of bad bacteria, yeast, and candida
  • hormonal changes
  • lifestyle changes
  • Poor diet, eating a lot of oil, sugar, and junk foods
  • blood problems
  • stress and related problems
  • some medications like corticosteroids, androgens, birth control pills
  • smoking

suppressing the Acne

best acne treatment
Image: caviarofswitzerland.com

Take one ice cube and cover it with a piece of cotton cloth. Now just dab it on an affected area. By this method, your pain caused by acne is going away. It relieves the pain and gives you a calm feeling.

10 BEST ACNE TREATMENT

01.Tea Tree Oil for Acne Treatment

best acne treatment
Image Courtesy: Google


Tea tree oil is one of the best acne treatment. It has the ability to fight bacteria and reduce skin inflammation. Take just ONE DROP of it and grab it on the acne. Keep the oil about 20 minutes and after that,  using cotton ball remove the oil.  According to researchers, tea tree oil work more slowly for some individuals, so be patient if this method won’t help you the first time.

02.Best acne treatment using lemon

best acne treatment
Image: livestrong.com

For this method, you will need lemon and honey.  Mix 3 lemon drops with 1/2 teaspoon of honey together.  Now apply the mixture on your pimple and after 20 minutes wipe it out using a clean cotton ball.

03. Turmeric for Best Acne Treatment

best acne treatment
Image: YouTube NaturalCures

Turmeric naturally brings down the swelling, kills bacteria and fight the infection. Add a little bit of water to 3 tablespoons of turmeric powder to make a paste. Apply this paste on the hurt area and leave it for 1 hour.  Wash it using warm water. Do this twice a day for a week and you will see the results.

04. Aloe Vera Treatment

best acne treatment
Image Courtesy: Google

This tropical plant’s gel is often used for lotions, creams and acne treatments.  For this, you will need aloe vera get and mint leaves. Take 1/2 teaspoon of aloe vera gel and 3 mint leaves and mix them well together. Apply it on acne and leave it overnight.

05. Apple Cider Vinegar

best acne treatment
Image Courtesy: Google

Apple cider vinegar has it’s own ability to fight many types of bacteria and viruses. It also contains organic acid that can kill acne. What you have to do is mix one drop of apple cider vinegar and 3 drops of water. If your skin is sensitive use more water. Gently apply it to the skin using a cotton ball. After 20 minutes rinse it using clean water.

06. Honey and Cinnamon Mask

best acne treatment
Image: elnuevodiario.com

For this method mix 2 tablespoons of honey and 1 tablespoon of cinnamon together to form a paste. Apply this mask on your face. After 10-15 minutes rinse the mask completely.

07. Apply Green Tea

best acne treatment
Image: elnuevodiario.com

Drinking green tea every day can promote good health. It is very high in antioxidants, which can help to reduce inflammation.  Apply 2% to 3% green tea extract to the skin. Put the green tea into the baling water for a 2-3 minute and allow it to cool.  Using a cotton ball apply the tea to the skin.

08. Tomato Acne Treatment

Image; easyhacker.com

Tomatoes are rich in vitamin c and it acts as the best acne treatment.  It helps removes whiteheads and blackheads too. All you have to do is cut afresh tomato and rub it on your skin for 2 minutes. Next, wash the face with cold water. Use this remedy twice a week.

09. Banana peel

best acne treatment
Image Courtesy: Google

Why always eat a banana and throw the peel away when you have perfect chance to use it as the acne treatment. Remove the peel of the banana and cut a strip of banana peel into 2 to 3 pieces. Rub the soft, inside layer of the banana peel on your face. Do this 4 to 5 minutes every day and results will appear within a week.

10. baking soda

best acne treatment
Image: healthline.com

Another great acne treatment. Breaking soda kills germs and brings down swelling. It helps to pull extra oil out and clean away dead skin cells. You will need baking soda and cucumber for this treatment. Mix one tablespoon of baking soda with cucumber juice to make a thin paste. Use plain water if you don’t have cucumber juice. Put it on the hurt area. After 20 minutes wash it with warm water.


How to Make Sugar Wax Recipe in 3 Steps

Sugar wax recipe
Image Courtesy: Google

Every culture has secret beauty tips for women. Even women in an ancient time cared about beauty. But surprisingly they had used some different methods to achieve their beauty. And they had their own method for waxing called sugaring. So here is their secret sugar wax recipe to try waxing at your home.

What is Sugaring

Every woman has unwanted hair in her body. In fact, women have been removing unwanted body hair for like thousands of years. The women in ancient Egypt got hair removed by a method called sugaring. This is much like waxing, sugaring helps to remove hair from the roots. so that, it becomes softer when the hair grows back.  So this sugaring methods still use today and it is super easy to do even at your home. And the best thing about sugaring is it less painful than waxing. This is because the paste doesn’t stick to the body which makes less irritating.  of sugaring doesn’t stick So pretty sure you will love this method.

Sugar Wax Recipe

what you will need:

  • one cup of  sugar (WHITE SUGAR)
  • a quarter cup of lemon juice
  • a quarter cup of water
  • pan(to boil the ingredients)
  • a jar for put your wax in
  • a spoon for the mix the ingredient
Sugar wax recipe
Image: .rightimage.co

Easy 3 Steps for Making Sugar Wax Recipe

  1. To make the wax combine one cup of sugar, a quarter cup of lemon juice and a quarter cup of water. Mix them well. Then bring that to boil about 5 to 7 minutes. When it’s done it should be golden brown color.
  2. Now let it cool for couple minutes. If your mixture gets too dark well you will have to throw it away because it is overcooked and it will harden into candy.  Also, cooking time depends on the climate, so you will have to carefully watch it make right color.
  3. After about five minutes you can put the mixture into the jar. Then allow it to cool it for 20-30 minutes and please please don’t touch it or use it until it gets cool.


Sugar wax recipe
This is the perfect light brown color for sugaring. When your mixture gets this color turn off the gas. Image Courtesy: Google 
Sugar wax recipe
Put your mixture into a jar Image Courtesy: Google  

How to Apply Sugar Wax Recipe

Now using a knife apply in the opposite direction of your hair grow.

Sugar wax recipe
Image Courtesy: Google

Yes! you sew it correctly. You have to apply opposite direction of your sugar wax recipe because this is not supposed to be used in the same way as regular wax. And it will help to prevent broken and ingrow hairs.

After applying let it cool for few minutes and rip it off in the direction of the hair growth. Apply a little bit of pressure at the end to help to swell.

Sugar wax recipe
Image Courtesy: Google

See, it’s not as hurt as waxing.

Tips for Sugaring

  • For trying this method at least you should have about one cm long hair for this to work.
  • But I don’t suggest this method for too long hair either. You can trim in sensitive areas first.
  • Where should you apply this sugar wax recipe? Literally, you can apply any part of your body. You can apply it on your face, armpits, and lady parts.
  • Please be careful not to burn yourself with this method.
  • always work in small sections for sensitive areas.
  • This method is not PERMANENT. This lasts about 3-4 weeks and then you will have to do this method again.
  • Also, you can keep this mixture several months in the fridge.
  • Finally and the last I know what you are thinking! Yes, weirdo. You can eat this and it won’t harm we used just natural ingredients.