
DIY T SHIRT INTO tie-up dress

What you’ll need
- oversized t-shirt
- scissor
- measuring tape
- needles and treads or sewing glue
For this DIY t shirt project, I suggest you select large or an extra large t-shirt. the larger the dress are the more length you can have to work with which is really good. okay then’ let’s start! 1st take your t-shirt and put it inside out and fold it in half. Now remove all the wrinkles out of the t-shirt.
Now make a small mark under the armpit of the t-shirt. Measure 3 inches from the armpit to below you just drew. now mark a small point in between the two marks. now measure 7 inches toward the middle of the shirt and trace out kind of like a “U” shape across the marks you just drew.
After done with that mark the hip and front line. Now cut off all the marks you just made. Open the shirt up and you should have two separate pieces. Now we are gonna start sewing part. But you can use sewing gum as well. sew on the marks we made (3 inches from armpit) earlier. if you need a slim dress cut the sides all the way down and sew it again removing about a half inches. Make sure you do this to both sides. sew or glue the cut outlines we made.
Now cut 8 inches long 3 inches wide two-strip from the leftover fabric. Tie one strip to the front and other to the back. now you are officially done with your beautiful tie up summer dress you just made from an oversized t-shirt.

DIY t shirt into “v” neck dress

Cut off ‘v’ neck dress are quite famous these days. This takes only a few minutes and makes any tee look wooow! So let’s make this from men’s t-shirt.
what you’ll need
- a t-shirt
- scissor
- ruler
Take your t-shirt and measure the length you want your V neck to end. Draw V shape from the place where you measure. make sure to draw just under the collar area, so that you can keep collar strip. Next, mark another 3 lines about 3 inches just under the collar area.
Now fold the only front part of the t-shirt. Make sure collar seam are still sat on each other. now carefully cut the top of the collar area. Next carefully cut the other marks you made. and this is super easy.

oversized t shirt into one shoulder dress

Lay your extra size t-shirt on a flat surface. Now mark the lines as shown in the picture.

If you are a beginner 1st you can make a pattern and draw it on your t-shirt. Now you have one side cut off t-shirt. you can just keep the t-shirt that way or you can remove the hand from the other side. or you can make cold shoulder hand for the other side. Each of those looks beautiful you can choose either one. After you done with cutting using a perfectly fit dress mark the hip and bottom side. now cut off the extra fabric. sew or glue on it. You are done!
Recreate men’s t-shirt into a cute dress

What you’ll need
- L or EL t-shirt
- scissor
- elastic
- sewing machine
This is also an easy DIY project but the outcome is priceless. what you have to do is lay your t-shirt on a flat surface and mark where you want to attach your waistband. Next measure your waist remove 3 inches from your waistband. For example, if your waist is 28 inches then your new size is 24 inches. Cut your elastic band on your waist measurement. Now stitch elastic band to the t-shirt. Next cut sleeves. okay, you are finished!
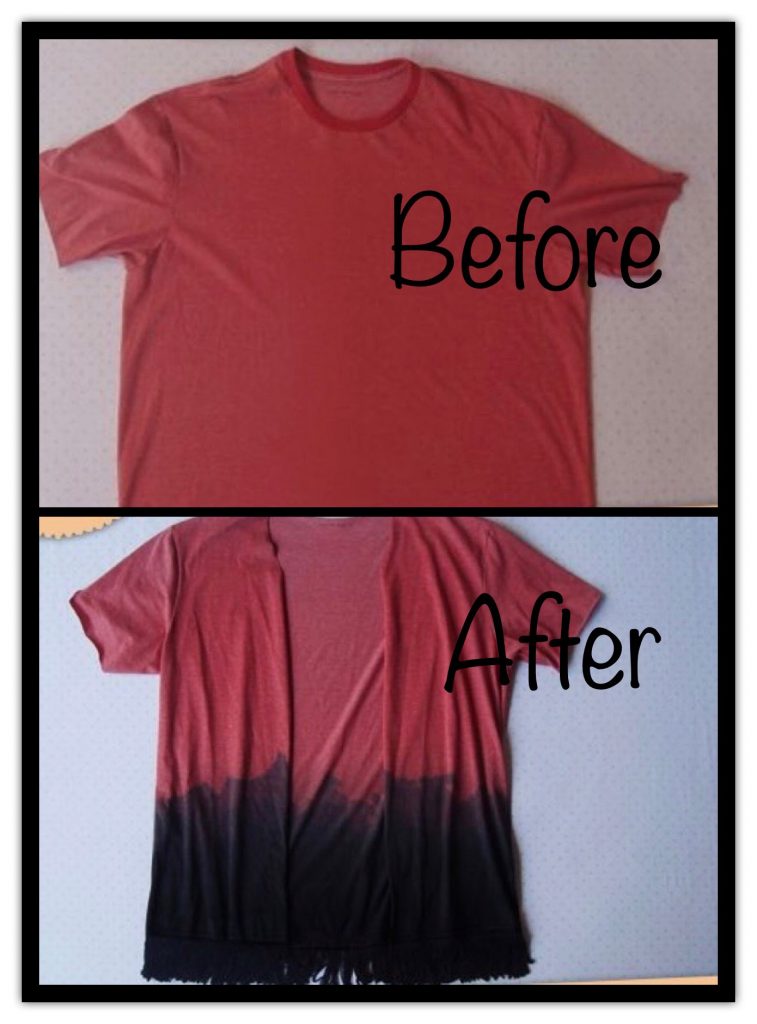
Recreate a diy t shirt kimono
what you’ll need
- an oversized t-shirt
- scissor
- chalk
- Fringe
- needle and treads or glue
1st lay your shirt on the flat surface and find the center. Then mark a straight line with chalk and cut only the front piece of the shirt.
2nd mark a V shape on the collar (as shown in the 3rd picture) and cut it off. Stretch the fabric along the cut. As you can see you already have a kimono.
Now lay your kimono over to the back. stitch or glue the fringe to kimono. Next using fabric paint you can color the bottom part of the kimono. These two steps are totally optional and if you don’t need an extra work you can just keep your kimona that way.
That’s it! we are done. Your DIY t shirt kimono will be super cute with your DIY bralette and DIY shorts.
