You may have personal experience of getting hair highlights at home and ending up with look like a zebra? Well, that can happens if you are not using correct instructions. The easiest solution for this matter is getting hair highlights by professionals, but isn’t that too expensive and time-consuming?
Get hair highlights at home can save you both money and time, but this DIY highlight project is a bit tricky. With little practice with my tips, you are able to get the highlights of your dreams in a comfortable way.
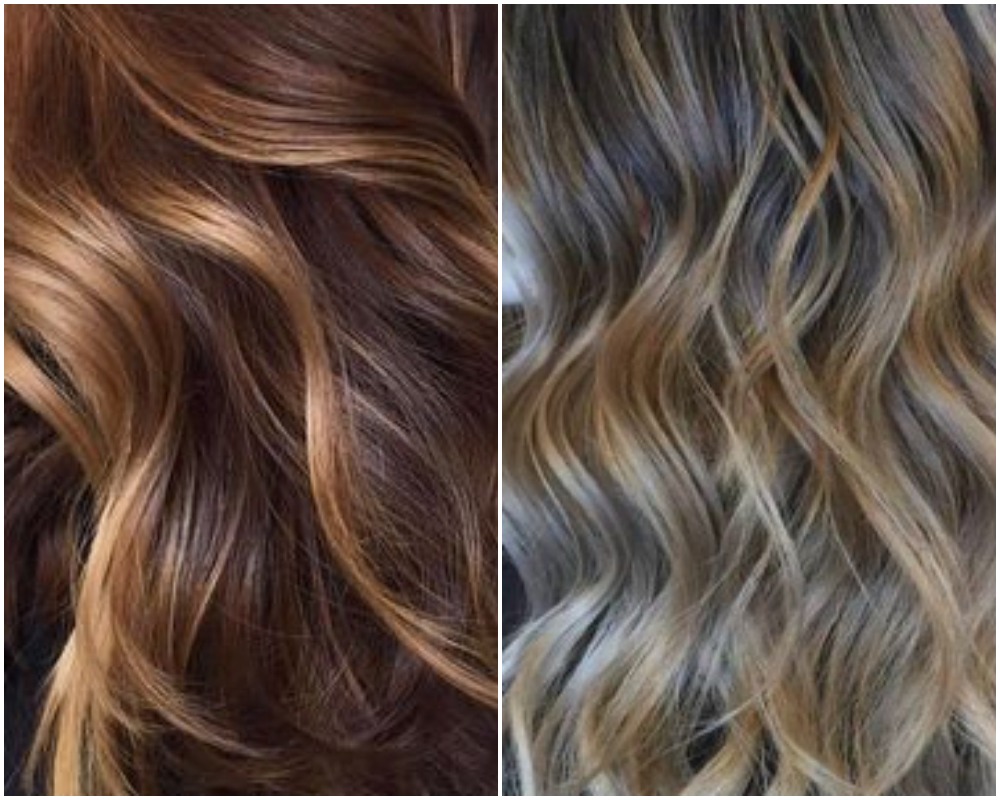
Why Would You Need Hair Highlights ?
If you are not into highlights but thinking why would anyone need hair highlights well don’t you think just a single-process color is boring, sometimes. And not only that highlights can prominent your eye color, visualize the slim face and bring out cheekbones. Also, highlights are really good for women who have little hair, because it makes the illusion of fullness. It also works with all hair colors.
Choosing the correct color is key
Hair highlights require bleach or dye, lighter than your natural hair color. The best way to choose hair color is by keeping two or three shades lighter than your base color. But you should be careful not to choose a too-light color, if not it will create a stripy, unnatural look.
If you already have dyed hair you will have to use bleach. Remember if you have used henna or vegetable dyes, it won’t support for new lightning.
Also, if you have dark hair color like black hair you will definitely need bleach because normal dye won’t have the power to highlight dark hair, but if you have natural blonde or light color, you are able to use bleach-free highlight kit.
You should remember that highlight color will depend on the color of your natural hair. For example, if you choose caramel highlights but you have brown base it will totally different with red color hair. So always choose highlights kit that specially offers your natural base (for brown hair).
Don’t Avoid the strand test.
If you are getting hair highlights at home then it is important to start with the standard test. So after the test, you can get highlight without any fear and also you have a practice, to keep time.
Usually, the lightness of highlighter depends on the strength and how long it’s left on your hair. For a more natural look use fewer highlighter levels.
Protect your skin and clothes
You must wear gloves to protect your hands. Usually, these gloves come with highlighter kit. You can use a towel or plastic bag to wrap around your shoulders.
You don’t need the plastic cap
You know that highlighter set usually comes with a plastic cap kit. But you don’t need this tool unless you need to end up your DIY highlights with an uneven look.
Foils
Foil is a heat conductor, which means foils helps to lighten hair faster. So make sure o keep an eye on the time when you get hair highlights at home. Using foil can help to keep the hair straighter way and also it helps to get a perfectly symmetrical pattern you need.
If you don’t have fancy saloon brush when they highlighting, it’s perfectly no harm to use a paintbrush or toothbrush.
Moisture Your Hair
Stay tuned about the time and remember the first piece you started first will be finished first. After rinsing each section using lukewarm water, give a good shampoo and conditioner.
After all, use toner to look counteract the hair color. Toner will add a super shine and smoothy look on your hair. After hair highlighter protecting your hair is important.
Do you like this post? Then you will like other posts as well. Get tons of DIY projects, beauty tips and fashion tips on https://scissortwists.com .